
Inside only window cleaning: get streak-free glass at home
Inside only window cleaning: get streak-free glass at home
You can clean interior-only windows yourself, safely and streak-free, right now. Here is the short checklist:
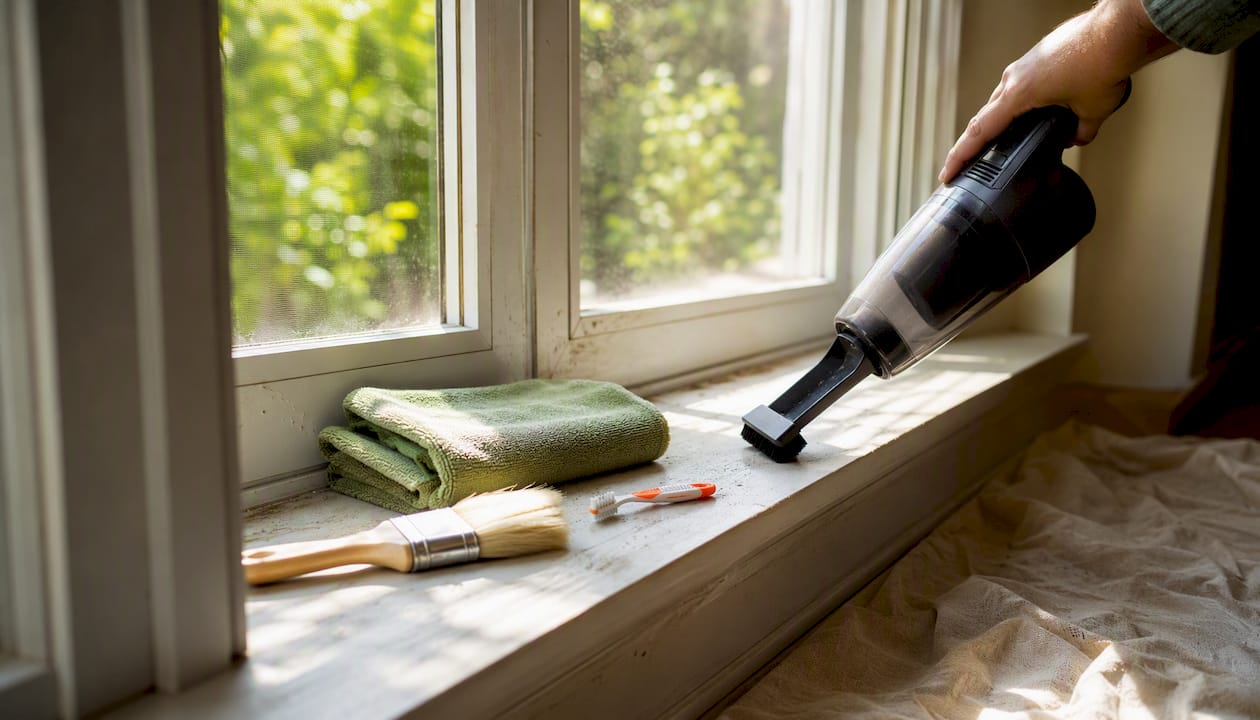
- Dust frames, sills, and tracks first (vacuum with a brush attachment or use a dry microfiber cloth).
- Mix an ammonia-free cleaning solution — either a store-bought product like Windex ammonia-free or a 50/50 white vinegar and water mix.
- Apply the solution from the top of the glass downward.
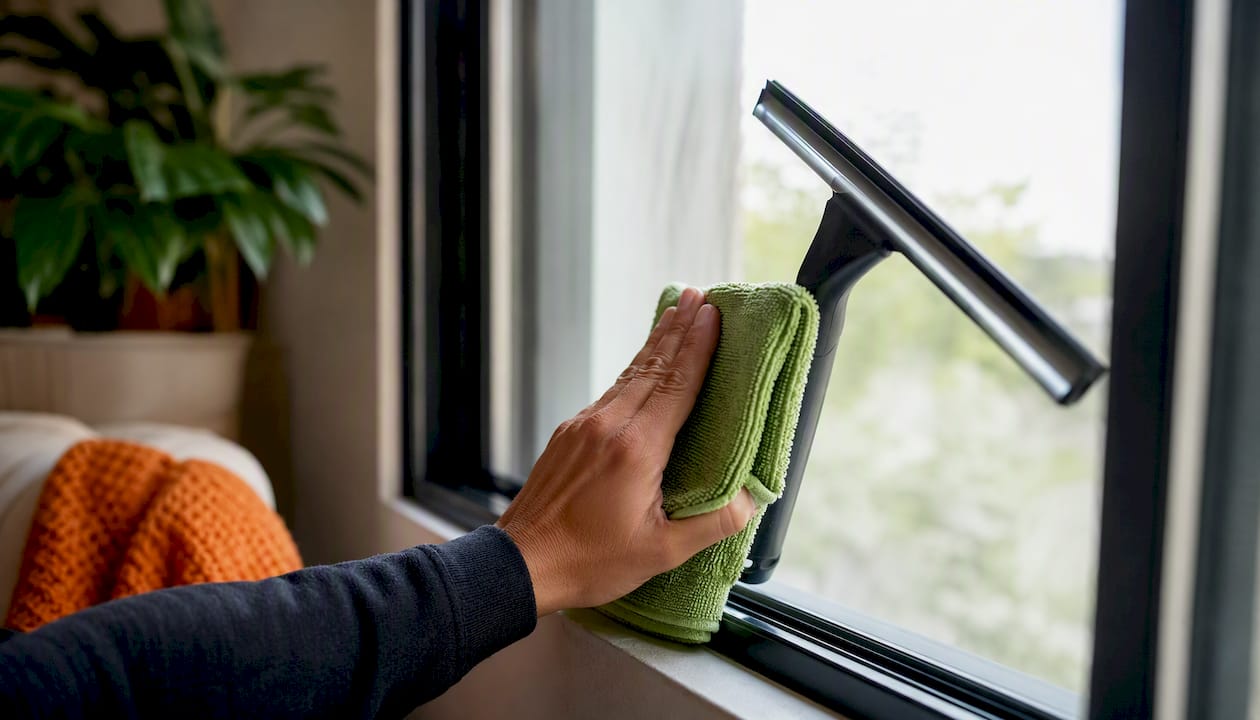
- Pull a rubber squeegee across in a smooth, overlapping S-pattern to avoid streaks.
- Buff the edges and any remaining drips with a clean, lint-free microfiber cloth.
Two safety notes before you start: never use a metal scraper on interior glass, and use a stable step stool (not a chair) for any window above shoulder height.
Key takeaways
Streak-free interior windows come down to three things: dry prep before any liquid touches the glass, an ammonia-free solution applied generously from the top down, and a clean squeegee blade wiped after every pass.
| Point | Details |
|---|---|
| Prep before you clean | Vacuum tracks and frames first to remove grit that scratches glass during wet cleaning. |
| Use ammonia-free solution | White vinegar and water or a store-bought ammonia-free cleaner protects frames and seals. |
| Squeegee technique matters | S-pattern, top-to-bottom, blade wiped after every pass — this eliminates most streaks. |
| No metal scrapers, ever | Metal contact scratches glass permanently; soak stubborn deposits with vinegar instead. |
| Ateliermaids for the GTA | Flat-rate, insured interior window cleaning with a satisfaction guarantee across the Greater Toronto Area. |
Table of Contents
- What tools do you need for inside only window cleaning?
- How to prepare before you start wet cleaning
- Which cleaning solution should you use?
- Step-by-step interior window cleaning method
- How do you clean screens, frames, and window tracks?
- Removing stubborn spots and mineral deposits safely
- How often should you clean interior windows, and what are the safety rules?
- When should you call a professional window cleaner?
- Why gentle cleaning matters: what the industry says about preserving glass
- Ateliermaids makes interior window cleaning easy in the GTA
- Sources
What tools do you need for inside only window cleaning?
Gathering the right supplies before you touch the glass saves you a second trip to the hardware store and protects your frames and finishes.
Essential tools:
- Lint-free microfiber cloths (two or three — one for applying solution, one for buffing)
- Rubber squeegee with a replaceable blade (a 30 cm / 12-inch blade suits most residential panes)
- Spray bottle for homemade solution
- Soft scrubber pad or a lambswool applicator for larger panes
- Vacuum with a brush attachment for tracks and sills
- Bucket for diluted solution on bigger jobs
Cleaning products available in Canada:
- White vinegar (sold at every grocery store — the backbone of most DIY mixes)
- Ammonia-free glass cleaner such as Windex ammonia-free or a store-brand equivalent
- Distilled water, worth buying if your tap water is hard (common in many parts of Ontario and the Prairies), since mineral-heavy tap water leaves spots even after a good squeegee pass — independent testing confirms distilled water reduces spotting significantly in hard-water areas
- Mild dish soap (a single drop in warm water cuts greasy fingerprints without sudsing excessively)
Safety callouts: skip metal scrapers, abrasive scrub pads, and household solvents like acetone on any painted or vinyl frame. Wear nitrile gloves and eye protection if you use any solvent-based spot cleaner.
Pro Tip: Paper towels leave lint and can micro-scratch glass over time. Microfiber cloths are reusable, lint-free, and genuinely better — keep a dedicated set just for glass so they never pick up grit from other surfaces.
How to prepare before you start wet cleaning
Skipping prep is the single most common reason a clean ends with scratched glass or a soaked window sill. Loose grit dragged across a pane by a wet cloth acts like sandpaper.
Start by clearing the sill: remove candles, plants, and any décor, then lay a folded towel or a small drop cloth on the sill and floor below to catch drips. If you have interior blinds or curtains, take them down or tie them well back.
Next, dry-clean the frame, sill, and tracks before any liquid comes near the glass. A vacuum with a brush attachment pulls out the bulk of the dust and debris. For the tracks specifically, a soft paintbrush or an old toothbrush loosens caked-in grit that a vacuum nozzle misses. This step matters because trapped abrasive particles between glass and cleaning materials are a leading cause of surface scratches — professional guidance is explicit on this point.
If your windows have a tilt-in or tilt-wash feature (common on double-hung models), test the tilt mechanism before you start so you are not wrestling with a stiff hinge mid-clean.
Pro Tip: Check the window manufacturer’s care instructions before using any new product. Pella, for example, publishes specific guidance on which cleaners are safe for their frame finishes — a two-minute check can prevent a costly mistake.
Which cleaning solution should you use?
The short answer: ammonia-free, always. Ammonia can cloud tinted glass, degrade vinyl and rubber seals over time, and leave a haze on frames. Pella’s manufacturer guidance specifically recommends ammonia-free or vinegar-based solutions for streak-free interior cleaning.
Homemade recipes
For general cleaning: mix equal parts white vinegar and distilled (or filtered) water in a spray bottle. This is cheap, effective, and low-toxin — the acidity cuts mineral deposits and light grime without leaving a residue.
For greasy spots (kitchen windows, fingerprint-heavy panes): add one small drop of mild dish soap to 500 mL of warm water. Rinse the glass with plain water afterward so the soap does not leave a film.
Store-bought vs. homemade
| Factor | Store-bought (ammonia-free) | Homemade (vinegar + water) |
|---|---|---|
| Convenience | Ready to use, no mixing | Requires a spray bottle and mixing |
| Cost | Higher per use | Very low |
| Streak risk | Low (formulated) | Low with distilled water |
| Frame safety | Check label for vinyl/rubber | Generally safe; rinse frames after |
| Scent | Mild or fragrance-free options | Vinegar smell fades quickly |
Pro Tip: If the vinegar smell bothers you, add five drops of lemon essential oil to the mix. The scent dissipates in minutes once the glass dries, and the oil adds no residue at that concentration.
Step-by-step interior window cleaning method
Follow this sequence and you will avoid the two most common problems: streaks and drips soaking into the frame.
- Vacuum and brush tracks and frames (already done in prep — confirm before proceeding).
- Apply solution generously to the glass from the top down, using a spray bottle or a damp applicator pad. Do not be stingy; a wet surface floats grit away rather than grinding it in.
- Agitate gently with a soft scrubber or the damp microfiber cloth, using light circular motions on any visible grime.
- Squeegee from the top corner, pulling across in a slight S-pattern and overlapping each pass by about 2–3 cm. Keep the blade at roughly a 30-degree angle to the glass. Professional technique guides emphasise working top-to-bottom and wiping the blade clean with a lint-free cloth after every single pass — skipping this step redeposits grime in a thin streak across the next pass.
- Wipe the bottom edge with a folded microfiber cloth to catch the final bead of solution.
- Buff any remaining haze or drips at the corners and edges with a dry microfiber cloth.
Viracon’s glass cleaning and maintenance recommendations reinforce the rinse-then-squeegee sequence: prompt removal of excess solution prevents abrasive particles from drying onto the surface.
Troubleshooting streaks: streaks almost always come from one of three sources — a dirty squeegee blade, too much soap in the solution, or cleaning in direct sunlight (the solution dries before you can squeegee it off). Clean on a cloudy day or when the window is in shade. Replace a squeegee blade when it starts to skip or leave a consistent line; most rubber blades last a season of regular use before they need swapping.
Pro Tip: Fold your microfiber cloth into quarters. Each time one face gets saturated, flip to a clean face. Four faces per cloth means you are always buffing with something dry.
How do you clean screens, frames, and window tracks?
Screens and tracks are the parts most people skip, and they are also the parts that make the whole window look dingy even after the glass is spotless.
Screens: remove them carefully and carry them to a bathtub or an outdoor area. Lay each screen flat, wet it with a gentle spray, and scrub lightly with a soft brush and a small amount of mild detergent. Rinse thoroughly, shake off excess water, and lean them upright to air-dry completely before reinstalling. Never force a damp screen back into its channel — moisture trapped behind the frame breeds mould.
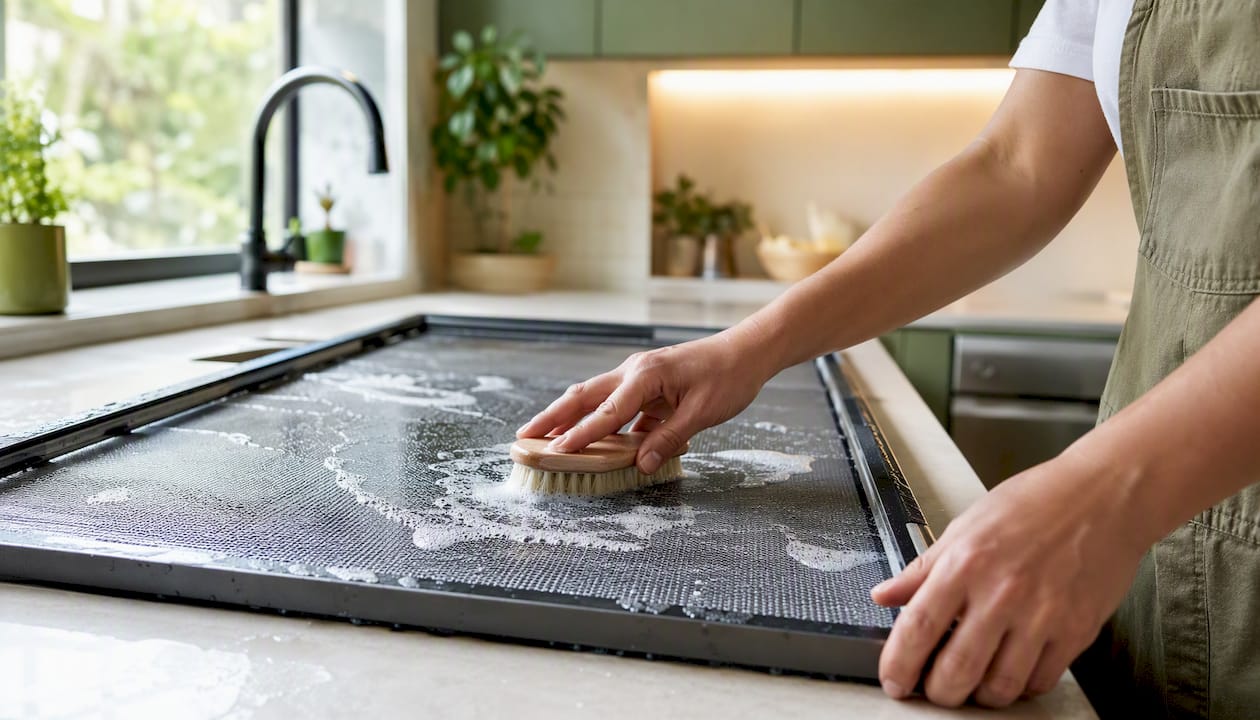
Tracks: vacuum first to remove loose debris, then apply a small amount of white vinegar solution with an old toothbrush and scrub along the channel. Wipe out the loosened grime with a damp cloth, then dry the track thoroughly. A dry track also slides better.
Frames: warm soapy water on a soft cloth handles most painted, vinyl, or aluminium frames. For wood frames, wring the cloth nearly dry before wiping — standing water can raise the grain or lift paint. Avoid pressure washing or harsh solvents on any sealed or painted surface. The same principle applies to interior doors and nearby trim — gentle cleaners protect finishes far longer than aggressive ones.
Pro Tip: After cleaning tracks, run a thin bead of silicone-free dry lubricant (or even a dry wax candle) along the channel. Windows slide noticeably smoother and the track stays cleaner longer.
Removing stubborn spots and mineral deposits safely
Hard-water mineral deposits, paint splatter, and adhesive residue all need a targeted approach. The rule that applies to all of them: soak first, scrape never (on glass).
- Mineral deposits (white chalky rings): soak a folded cloth in undiluted white vinegar and press it against the deposit for five to ten minutes. The acidity dissolves calcium and magnesium salts. Wipe away, then rinse with clean water and squeegee dry.
- Paint splatter: a small amount of rubbing alcohol or a purpose-made adhesive remover on a microfiber cloth usually lifts dried latex paint. Work in a small area, rinse immediately with water, and squeegee.
- Adhesive residue (sticker labels, tape): the same rubbing alcohol approach works. Always rinse the frame and glass after any solvent contact.
Warning: concrete slurry, mortar, or highly alkaline construction residue must be addressed promptly. Left to cure, these deposits etch the glass surface permanently. Do not attempt to scrub them off dry. Soak with water first, then use a pH-neutral cleaner. If the glass already looks frosted or pitted, call a professional — etching cannot be reversed by cleaning.
Industry guidance is clear: test any new product on a small, inconspicuous area first, use a non-abrasive applicator, and never allow metal contact with the glass surface.
Pro Tip: For persistent mineral rings, a paste of baking soda and white vinegar applied with a soft cloth and left for two minutes often removes what a straight vinegar soak misses — rinse thoroughly and squeegee immediately after.
How often should you clean interior windows, and what are the safety rules?
Recommended frequency:
- Thorough interior cleaning: at least twice per year, typically spring and fall, as Pella’s care guidance recommends
- Quick wipe-downs for fingerprints and light smudges: as needed, which in a household with kids or pets can mean monthly
- After construction, renovation, or a dusty season: clean immediately rather than waiting for the scheduled cycle — construction dust contains fine abrasive particles that etch glass if left to sit
Ladder and reach safety:
- Use a purpose-built step stool with a non-slip platform, not a chair or a stack of boxes
- Keep the floor below clear and dry before climbing
- Wear non-slip footwear
- Never overreach to the side — move the stool instead
- For windows above 2.5 metres from the floor, or any window where you cannot maintain three points of contact, call a professional
Households with children or pets: keep cleaning solutions out of reach during and after use, and ventilate the room while working with any solvent-based product.
When should you call a professional window cleaner?
Some jobs are genuinely better left to a pro, and recognising that early saves both time and glass.
Good reasons to hire a professional:
- Windows above 2.5 metres that require a ladder rather than a step stool
- Etched, mineral-stained, or post-construction glass where DIY methods have already failed
- Limited mobility or balance concerns
- A large number of windows where the time cost outweighs the savings
- Commercial or rental properties where a documented, insured service matters
What professionals do differently comes down to equipment and sequence. They carry tested solvents for specific residues, use professional-grade squeegees with fresh blades, and follow a preservation-first sequence that avoids the micro-scratches that accumulate from repeated DIY cleaning with the wrong tools. Some windows, particularly tilt-in double-hung models, are designed specifically to be cleaned from inside without any ladder at all — a pro will know which of your windows qualify.
Professional pricing varies considerably depending on the number of panes, accessibility, and whether exterior cleaning is included. Market guides note that complexity and access are the two biggest cost drivers, so getting a specific quote for your home is the only reliable way to budget.
Pro Tip: When booking a professional for interior-only cleaning, ask specifically whether they carry liability insurance and whether their team is background-checked. These two details separate a reliable service from a risk.
For residential window and carpet care in the Greater Toronto Area, Ateliermaids offers insured, vetted crews who handle interior window visits as a standalone service.
Why gentle cleaning matters: what the industry says about preserving glass
The cleaning industry frames routine window maintenance as preservation, not just aesthetics. Airborne contaminants, hard-water minerals, and fine grit accumulate on glass surfaces over time. Left uncleaned, they bond to the surface and eventually etch it permanently. Frequent, gentle cleaning interrupts that process before it becomes irreversible.
The same preservation logic underpins the rinse-and-squeegee sequence. Viracon’s maintenance guidance specifies that excess solution must be removed promptly with a squeegee to prevent abrasive particles from drying onto the glass. The goal is not just a clear pane today — it is a pane that stays clear and undamaged for years.
Manufacturers like Pella reinforce this by recommending product-specific care instructions and ammonia-free solutions, precisely because the wrong cleaner can degrade seals and coatings that are expensive to replace.
What this means for your cleaning routine
Gentle and frequent beats aggressive and occasional. A quick monthly wipe with a damp microfiber cloth does more for long-term glass condition than a twice-yearly scrub with the wrong product.
Ateliermaids’s take on interior window cleaning
The detail most DIY guides skip is squeegee blade angle. Hold the blade at roughly 30 degrees to the glass, not flat and not steep. Flat blades skip and chatter; steep angles push solution into the frame seal rather than pulling it off the glass. That single adjustment removes most of the streaking complaints we hear from homeowners who have tried everything else. Pair it with a blade wipe after every pass and a dry microfiber buff on the edges, and the result holds up well between professional visits.
Preservation matters here too. A glass surface that has been repeatedly cleaned with abrasive pads or metal tools shows micro-scratches that catch light and make the pane look permanently hazy. Gentle tools and the right solution protect the glass itself, not just the view through it.
Ateliermaids makes interior window cleaning easy in the GTA
Cleaning your own windows is entirely doable with the right tools and technique. But if you have hard-to-reach panes, post-construction residue, or simply a long list of windows and not enough weekend hours, Ateliermaids handles interior window cleaning as a standalone service across the Greater Toronto Area.

Every visit uses insured, background-checked crews who follow a preservation-first sequence: dry prep, ammonia-free solution, professional squeegee technique, and a detailed service report after every clean. Interior-only visits are available without bundling exterior work.
Book your interior window clean or check available service areas to confirm coverage near you.
Sources
- Clarity on Proper Glass Cleaning
- Glass cleaning and maintenance recommendations (Viracon)
- 6 steps to clean windows for a streak-free finish | Pella
- How to clean windows, glass, and mirrors | Wirecutter
- Mastering interior glass cleaning in Buffalo Grove, IL