
How to clean window screens properly at home
How to clean window screens properly at home
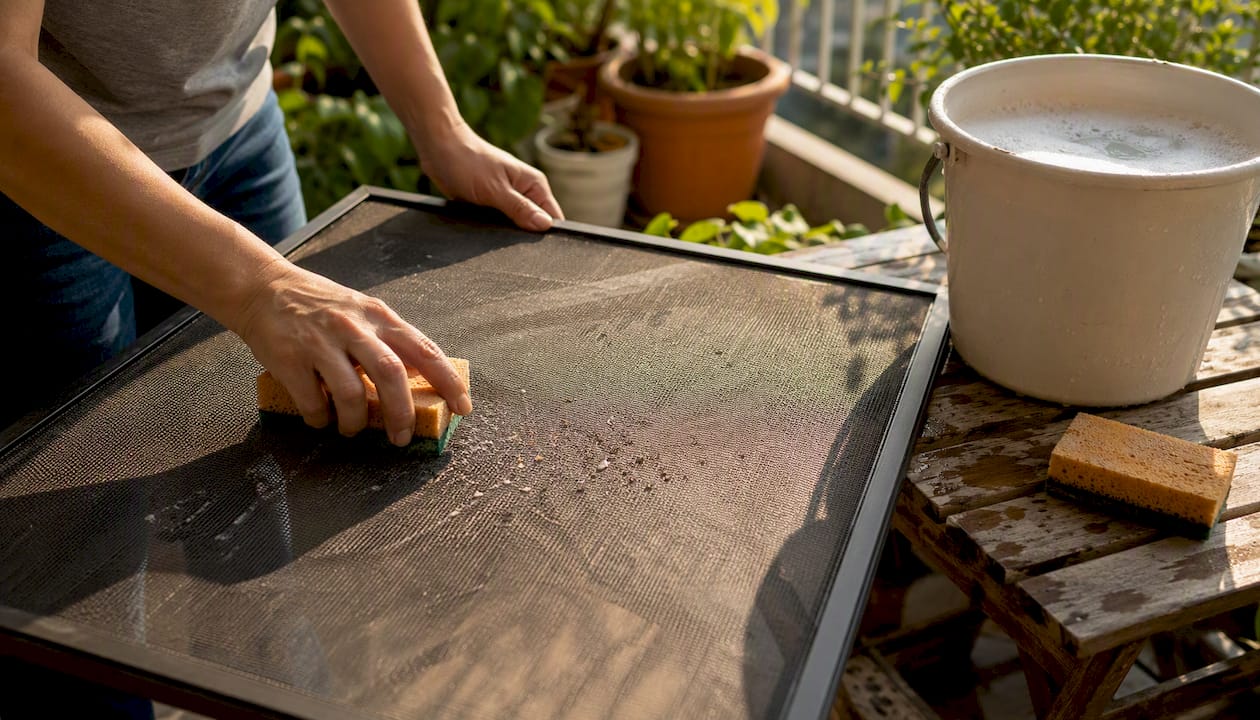
Removable window screens can be cleaned at home efficiently using warm water, a few drops of mild dish soap, and a soft-bristle brush. No special equipment needed. Martha Stewart’s guide recommends doing this twice a year, spring and fall, before buildup has a chance to affect your indoor air quality.
Here is what to expect from the process:
- Time per screen: 20–30 minutes including removal, washing, drying and reinstallation
- Core method: mild dish soap + warm water + soft brush + low-pressure rinse
- What to skip: pressure washers, solvents, WD-40, wire brushes
- Result: clear mesh, better airflow, and fewer allergens tracked inside
Key takeaways
Cleaning window screens twice a year with mild soap, warm water, and a soft brush is the most effective way to protect mesh integrity, improve airflow, and reduce indoor allergens.
| Point | Details |
|---|---|
| Clean twice a year | Spring and fall are the right times; buildup between seasons affects airflow and air quality. |
| Mild soap is the right cleaner | Warm water and a few drops of dish soap remove pollen, dust and grime without harming mesh or spline. |
| Label screens before removal | Painter’s tape with numbers prevents reinstallation errors, especially when screens are custom-sized. |
| Avoid pressure washers and WD-40 | Both damage mesh and spline; use a gentle hose setting and dry silicone spray for tracks instead. |
| Ateliermaids for full-service cleaning | Their house cleaning and window care services cover screens, tracks and glass across the Greater Toronto Area. |
Table of Contents
- What you’ll need before starting window screen cleaning
- How to remove window screens safely
- How to deep-clean removable screens step by step
- How to clean screens without removing them
- Drying, reinstalling and inspecting for damage
- What not to do when cleaning window screens
- When should you call a professional cleaner?
- A cleaning professional’s note on the one habit worth keeping
- Screens already clean but the rest of the house isn’t?
- Sources
What you’ll need before starting window screen cleaning
Gather everything before you pull a single screen. Stopping mid-job to hunt for a cloth is how frames get left leaning against walls and forgotten.
Essential supplies:
- Bucket with warm water
- A few drops of mild dish soap (Dawn or any gentle formula)
- Soft-bristle brush or a dedicated screen brush
- Microfibre cloths (two or three)
- Garden hose with a gentle spray setting, or access to a shower
- Vacuum with a soft brush attachment
- Towel or a drying rack
Optional for stubborn grime:
- White vinegar (for mineral deposits and hard water stains on windows)
- Baking soda for spot treatment on greasy frames
- Soft toothbrush for corners and spline channels
- Screen patch kit for small tears discovered during cleaning
Safety items:
- Rubber gloves
- Safety glasses if using vinegar solutions
- Step ladder with a spotter if any windows are above ground level
- Painter’s tape and a marker for labelling multiple screens
Pro Tip: Mild soap and a soft brush are not just the gentle option — they are the correct one. Stiff bristles and concentrated cleaners degrade the mesh fibres and can loosen the spline (the rubber cord holding the mesh in the frame) after just a few aggressive cleanings.
How to remove window screens safely
Most standard double-hung, slider, and casement windows have screens designed for removal without tools. Here is how to tell and what to do.
Step-by-step removal:
- Open the window fully so you have clear access to the screen frame.
- Look for small tabs, lift handles, or spring-loaded pins along the bottom or side of the frame. These are the release points.
- For double-hung windows: press the tabs inward simultaneously, tilt the bottom of the screen toward you, then lift it up and out.
- For slider windows: slide the screen to the edge of the track, lift it slightly to disengage the bottom track, then angle it out.
- For casement windows: screens typically sit on the exterior; open the sash fully, then release the corner clips and pull the screen inward.
- If the screen resists, stop. Do not force it. Check for a hidden clip or a painted-over edge before applying more pressure.
Labelling multiple screens:
Tear a small strip of painter’s tape, write a number on it, and stick it to the corner of the frame. Write the matching number on a piece of tape beside the window opening. Screens are often custom-sized, and swapping them during reinstallation creates a frustrating fit problem that is entirely avoidable.
| Window type | Release mechanism | Common removal direction |
|---|---|---|
| Double-hung | Spring tabs on bottom rail | Tilt inward, lift up |
| Slider | Corner clips or lift tabs | Lift up, angle out |
| Casement | Corner clips on exterior | Pull inward after opening sash |
If a screen has non-standard fasteners or a swollen wooden frame, photograph the hardware before attempting removal and consult the manufacturer’s guide.
How to deep-clean removable screens step by step
Set up your workspace first: a flat lawn, a clean tarp, or a bathtub all work well. The goal is a surface where the screen can lie flat and drain freely.
- Pre-rinse or vacuum. Knock off loose dust and pollen before introducing water. A quick pass with the vacuum brush attachment prevents muddy smearing. Screens trap pollen and allergens that can affect indoor air quality, so getting that dry debris off first matters.
- Mix your cleaning solution. Fill a bucket with warm water and add three to four drops of mild dish soap. For screens with visible mineral deposits or water spots, add a quarter-cup of white vinegar to the bucket.
- Wet the screen. Lay it flat and wet both sides with the hose on a gentle setting, or pour the soapy water over it evenly.
- Scrub gently. Using your soft-bristle brush, work in gentle circular motions across the mesh. Apply light, even pressure. Scrub both sides, paying extra attention to the corners where grime collects in the spline channel.
- Tap and drain. Lift the screen and tap the frame lightly against the ground or tub edge to release pooled soapy water from the mesh.
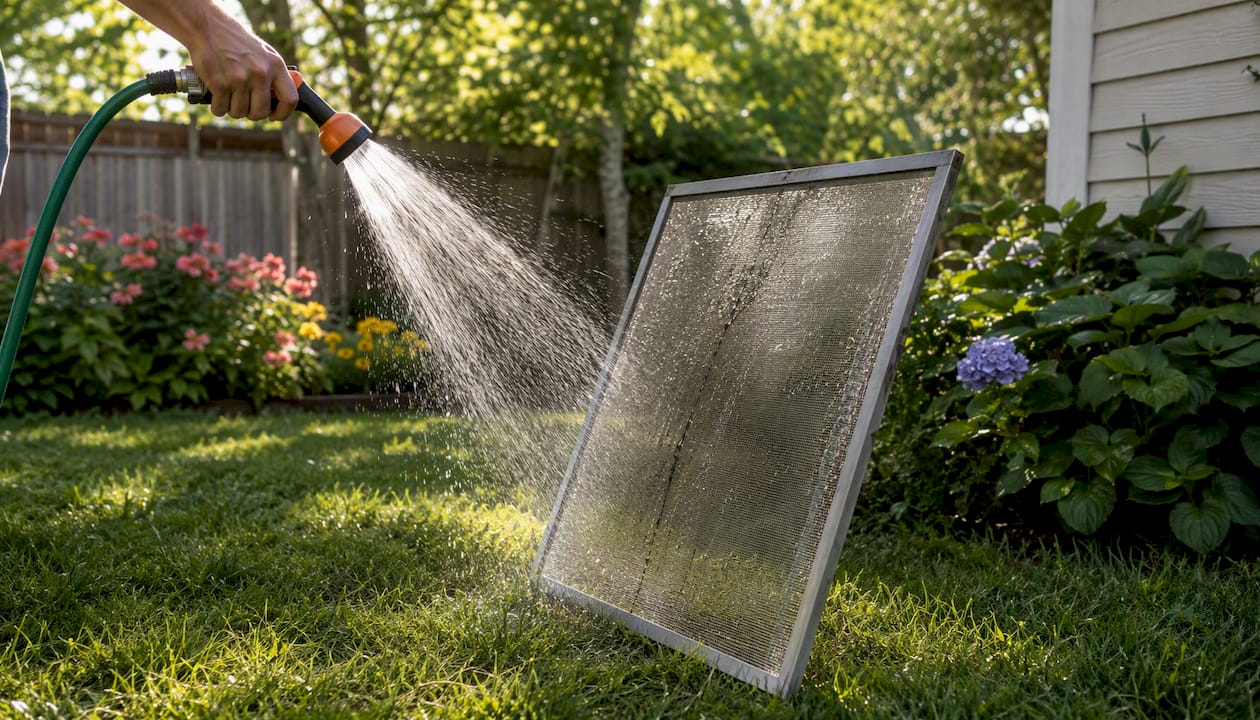
- Low-pressure rinse. Rinse from the house side outward so loosened debris exits away from the interior. Keep the hose nozzle at least 30 cm from the mesh and use the widest, gentlest spray pattern available.
- Repeat only if needed. One round of scrubbing handles most screens. A second pass is warranted only for heavy grease or mildew.
Drying: Stand the screen upright against a wall or fence in a shaded spot with airflow. Never reinstall a damp screen; trapped moisture between the frame and the window track encourages mould and warps wooden sills.
Pro Tip: Professionals rinse from the house side outward — a detail most DIYers miss. It pushes loosened grime away from the interior mesh surface rather than driving it deeper into the weave.
How to clean screens without removing them
Sometimes full removal is not practical: the screen is fixed, the window is awkward, or you just need a quick seasonal refresh between deep cleans. In-place cleaning with a vacuum and a mild spray solution handles light dust and pollen effectively.
What you need and how to do it:
- Vacuum with a soft brush attachment: run it across the interior face of the screen in overlapping passes, working top to bottom
- Mix a spray solution of warm water with a small amount of dish soap, or a 1:3 vinegar-to-water ratio for light mineral residue
- Spray lightly onto the screen surface (do not saturate)
- Wipe with a microfibre cloth using gentle horizontal strokes
- For exterior-facing grime, a long-handled soft brush lets you reach the outer surface from inside without leaning out
Pros and cons of in-place cleaning:
| Factor | In-place method | Full removal method |
|---|---|---|
| Time required | 5–10 minutes | 20–30 minutes |
| Thoroughness | Light surface clean only | Deep clean, both sides |
| Risk of damage | Low | Low if done correctly |
| Suitable for fixed screens | Yes | No |
| Allergen removal | Partial | Complete |
One caution: never lean out of a window or use an unstable ladder to reach the exterior side of a screen. If the outer surface needs attention and you cannot reach it safely from inside, that screen is a candidate for full removal or professional service.
Drying, reinstalling and inspecting for damage
Drying correctly matters more than most guides admit. If you have hard water, towel off excess water immediately after rinsing to prevent mineral spots from forming as the screen dries. Then lean the screen at an angle in a cross-breeze to speed drying and prevent frame warping. A fan pointed at the screen cuts drying time significantly on humid days.
Reinstallation steps:
- Before sliding any screen back in, vacuum the window track. Grit in the track scratches frames and makes screens bind.
- Align the top of the screen with the upper track first, then angle the bottom into place.
- Engage any spring clips or tabs until you hear or feel them click.
- Check that the screen sits flush with no gaps at the corners.
Inspection checklist before reinstalling:
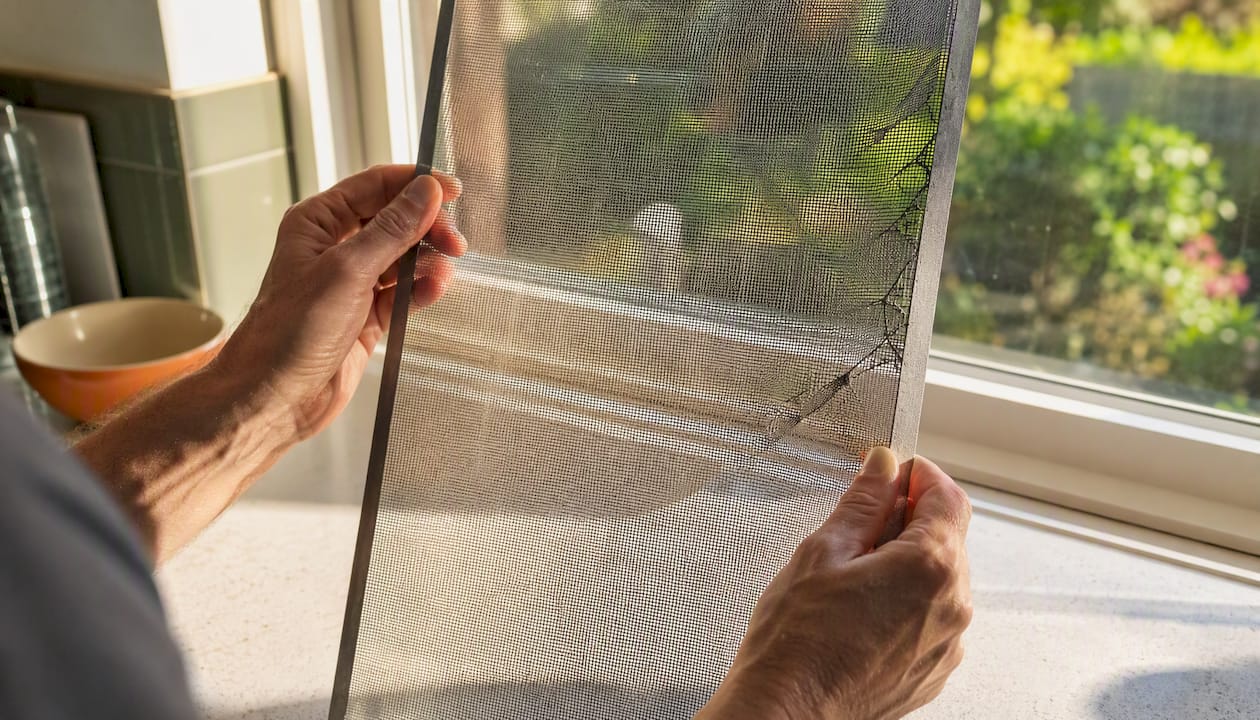
- Pinhole tears or larger rips in the mesh (hold the screen up to light to spot them)
- Sagging or loose mesh that no longer sits taut in the frame
- Frayed or partially dislodged spline
- Warped or bent frame corners
Small repairs: A screen patch kit handles tears up to about 3 cm. Apply the patch from the outside to keep the interior surface looking clean. For spline that has slipped out of its channel, a spline roller tool (available at any Canadian Tire or hardware store) seats it back without replacing the whole screen. Always check material compatibility first — fibreglass mesh, aluminium mesh, and pet-resistant mesh each require different patch materials.
Pro Tip: When in doubt about whether a screen is worth repairing, hold it up to a window and look through it. If light passes unevenly or you see multiple stress points near one corner, a full replacement is the better investment.
What not to do when cleaning window screens
A few common shortcuts cause more damage than a season of neglect.
- No pressure washers at close range. The concentrated stream tears mesh fibres and blasts the spline out of its channel. If you insist on using one, use the widest fan nozzle, stand at least a metre back, and keep the pressure setting low — but most professionals skip it entirely because the risk is not worth it.
- No WD-40 or similar lubricants. Industry sources are clear on this: non-cleaning lubricants attract dust, leave an oily residue on the mesh, and can degrade screen coatings. If a frame slides stiffly in its track, clean the track with a damp cloth and apply a dry silicone spray instead.
- No wire brushes or stiff metal tools. They shred fibreglass mesh on contact and score aluminium mesh permanently.
- No harsh chemical cleaners. Bleach, ammonia-based sprays, and solvent degreasers all degrade mesh fibres and can corrode aluminium frames. Mild dish soap handles everything a home screen needs.
- No over-scrubbing. Light, even pressure is the rule. Pressing hard does not clean better; it stretches the mesh and loosens the spline seating.
Pro Tip: If you notice the frame flexing or bowing while you scrub, you are pressing too hard. The frame should feel rigid throughout. Ease off and let the soap do the work.
When should you call a professional cleaner?
DIY window screen washing handles the vast majority of home situations. A few scenarios genuinely warrant professional help.
Hire a pro when:
- You have more than eight to ten screens to clean in one session
- Any windows are above the second storey
- Screens show persistent staining that soap and vinegar have not shifted
- Frames are warped, hardware is damaged, or screens are vintage with delicate mesh
- Someone in the household has severe allergies and thorough allergen removal is a priority
Professionals bring controlled low-pressure systems, specialised detergents formulated for screen mesh, and drying setups that prevent warping. The real edge, as The Spruce notes, is protecting spline and frame integrity through precise pressure control and tool angle — details that are easy to get wrong without practice.
Andersen Windows recommends pairing screen cleaning with a full window clean so freshly washed glass is not immediately re-soiled by a dirty screen being reinstalled beside it.
For allergy-sensitive households especially, the combination of professional-grade allergen removal and the convenience of a single booking makes the cost easy to justify.
Pro Tip: Ask any professional cleaner whether their crew cleans both sides of the screen and vacuums the window tracks as part of the service. If the answer is no, that is a gap worth flagging before they start.
A cleaning professional’s note on the one habit worth keeping
Pairing screen cleaning with your window washing in spring and fall is the single habit that pays the most dividends. Clean screens mean clean glass stays clean longer, better airflow through open windows, and fewer allergens cycling through the house when you open up for the season.
The labelling step is the one most homeowners skip and most regret. Spending two minutes with painter’s tape before you pull a single screen saves twenty minutes of trial-and-error reinstallation later. Do it every time, even for a house with just four windows.
Screens already clean but the rest of the house isn’t?
Ateliermaids takes the full cleaning load off your plate. For busy homeowners across the Greater Toronto Area, their house cleaning service covers the details most cleaners miss: window tracks, baseboards, vents, and the surfaces that accumulate grime between seasons.

If screens and windows are part of a larger spring or fall clean, their window and carpet care service handles both in a single visit. No coordinating multiple bookings, no worrying about whether the job was done right. Book your clean at Ateliermaids and get a confirmed appointment, not a vague estimate.
Sources
The following sources informed the recommendations in this guide:
- The Right Way to Clean Window Screens
- How to Clean Window Screens in 5 Easy Steps
- How to clean window screens | Andersen Windows
- Spring Cleaning: How to Best Clean Your Window Screens